A quick guide to shooting listing photos that turn into standout AI video tours — the right angles, lighting, order and the mistakes to avoid.
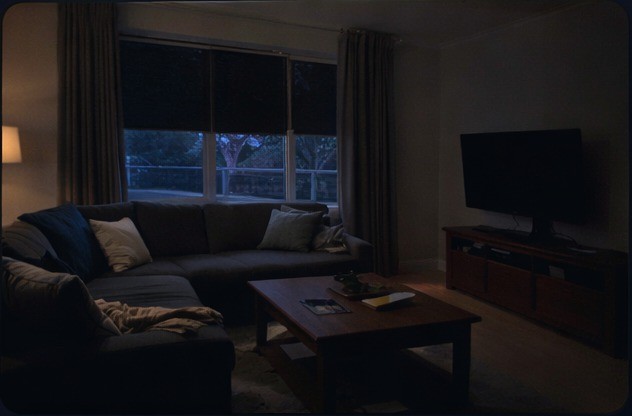 Before
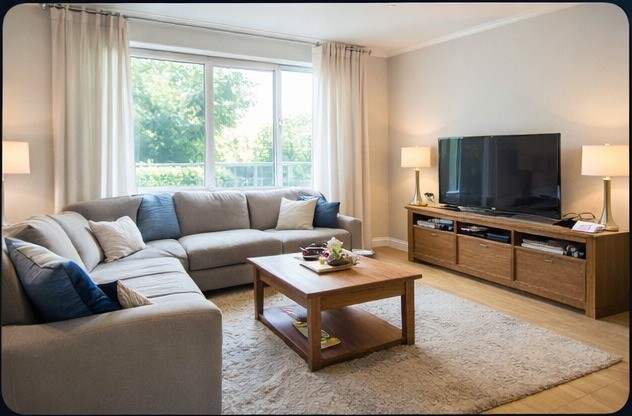 After
After
Follow these steps before you upload.
Always shoot horizontally. Vertical photos don't work well in video.
Open curtains, turn on lights. Bright rooms photograph better.
A straight horizon makes the room look larger and cleaner.
Doorways and corners capture more of the space in a single frame.
Hold the camera steady for sharp images. Rest on a surface if you can.
Include exterior, living areas, bedrooms, bathrooms and outdoor spaces.
Street, yard, front door.
Start just inside the door.
Living → Dining → Kitchen.
Don't skip the hallway shots.
Shoot in the order you walk them.
Finish in the backyard.
Most listings include 20 or more photos. The more you upload, the richer the video — up to a maximum of 38.
These create awkward video framing and wasted edges.
Standing too close makes rooms feel cramped.
Motion blur ruins cinematic movement.
Poor lighting reduces video quality and detail.
Upload photos in the order you want the video to flow.
Ensure kitchen, living and exterior are all covered.
Match the number of photos to the property.
Enough to show the key rooms and outdoor space.
A balanced video tour covering the full walkthrough.
Capture every room, angle and outdoor area for the full experience.
Pricing is pay-per-video with a minimum of 10 and a maximum of 38 photos, in either 720p or 1080p.